
Prepress guide · 7 min read
Bleed, trim and safe area: what each line means
A practical explanation of print file boundaries, with a worked size example, downloadable PDF pair and final PDF check.
Bleed, trim and safe area solve different problems. Trim defines the finished size. Bleed gives the cutter extra printed artwork beyond that edge. Safe area keeps essential content away from the cut. Confusing the three is a common cause of white slivers or clipped text.
The three boundaries
- Trim: the size after cutting. A 210 × 297 mm flyer has a 210 × 297 mm trim size regardless of how large the PDF page looks with marks.
- Bleed: artwork beyond the trim edge. It is deliberately printed and then cut off, so small cutting variation does not expose unprinted paper.
- Safe area: an inset inside the trim. Keep text, logos, barcodes and other must-keep details within it. Your printer’s margin may depend on binding and finishing.
Adobe notes that about 3 mm (0.125 in) is a common bleed amount, but the print provider’s specification controls the job. A background image should reach the outer bleed edge; a logo should stay inside the safe area. The InDesign bleed reference explains the document and export settings.
A 210 × 297 mm example
Suppose the printer asks for 3 mm bleed on every side of a 210 × 297 mm flyer. The artwork area including bleed is 216 × 303 mm: add 3 mm to the left and right, then to the top and bottom. The finished flyer remains 210 × 297 mm. A 5 mm safe margin, if the printer requests it, begins 5 mm inside each trim edge. Do not add the safe margin to the outside dimensions.
Crop marks may make the PDF’s media size larger again. They indicate where trimming should happen, but the actual page boxes and artwork still need checking. Adobe’s printer marks guide distinguishes trim and bleed marks.
Inspect the sample PDFs
These two synthetic teaching files have identical page geometry: a 216 × 303 mm MediaBox and BleedBox, and a 210 × 297 mm TrimBox inset by 3 mm on all four sides. In the first, the dark artwork reaches the outer BleedBox. In the second, the dark artwork stops at the TrimBox and the bleed is white. A small shift in the cut can expose that unprinted edge.
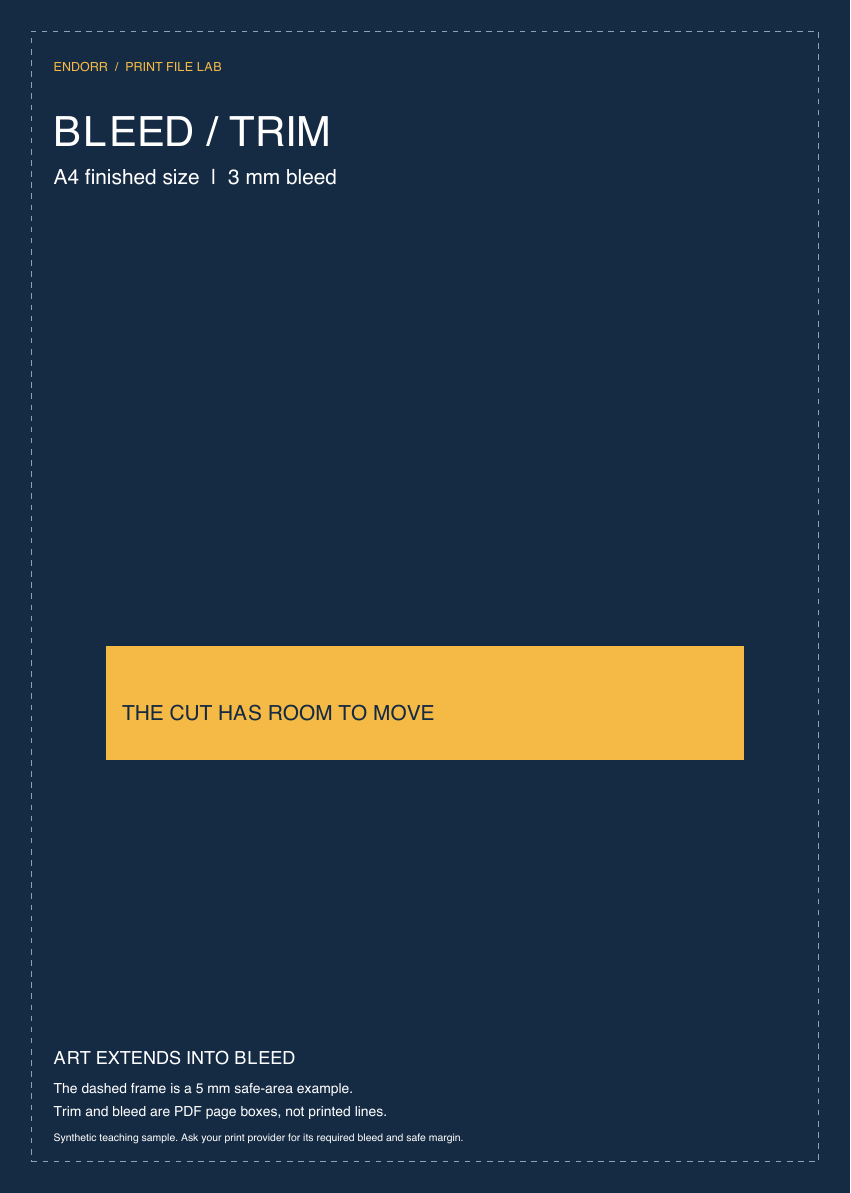
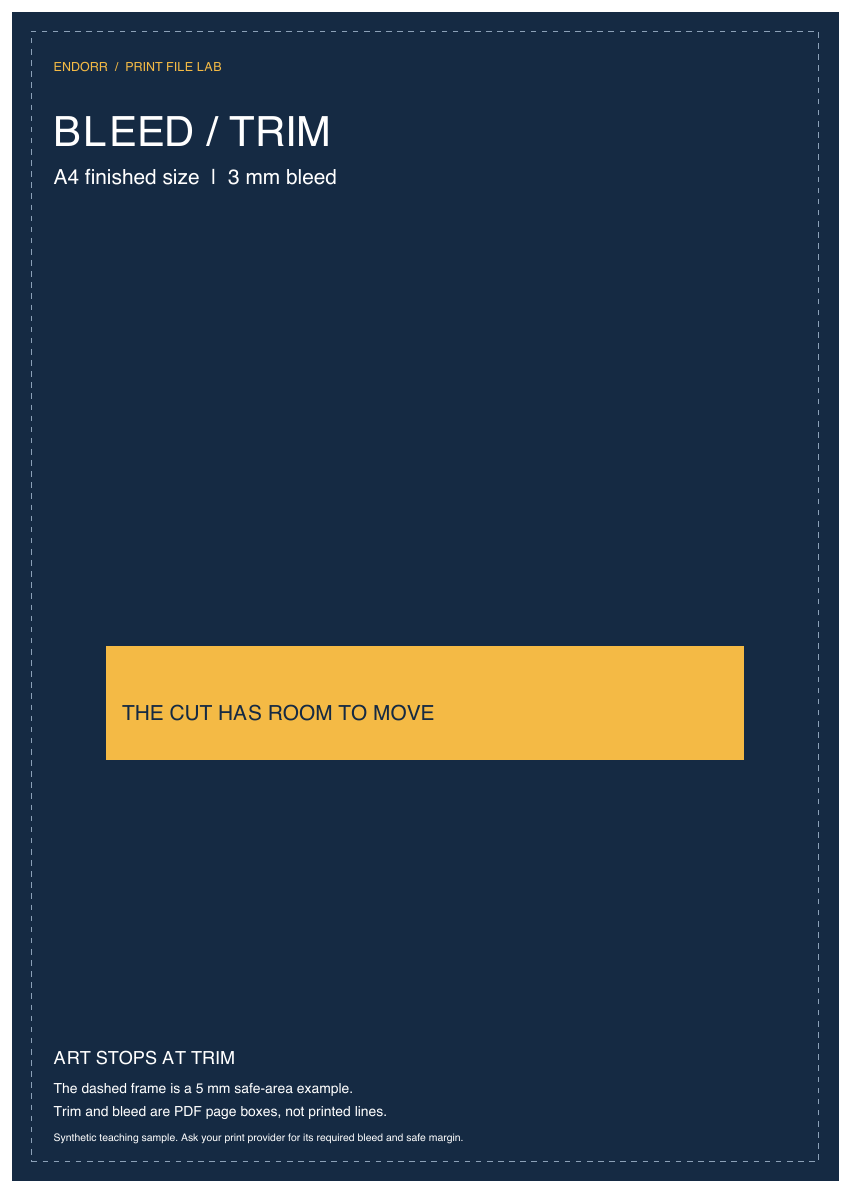
The dashed safe-area frame is drawn on these teaching pages so you can see it; it should not appear on a production file. Open both PDFs in a viewer that exposes page boxes and compare their TrimBox and BleedBox. The boxes alone are valid in both files: the difference is whether the artwork fills the bleed. These are illustrative files, not a printer-approved preset or an actual press result.
How to check the exported PDF
- Confirm the TrimBox matches the order’s final dimensions.
- Confirm the BleedBox extends past trim by the required amount on each side.
- Inspect all four edges at high zoom. The colour or image must continue into the bleed, rather than stopping at trim.
- Check that essential content remains inside the requested safe margin, including near folds and binding.
Common mistakes
Empty bleed: the export says “3 mm bleed,” but the design background ends at trim. Extend the actual artwork. Marks without bleed: crop marks identify a cut, but do not create extra printed image. One margin for every process: a perfect-bound cover, a sticker and a flat flyer can need different safe distances. Ask for the finishing specification.
Use the print-size calculator for your own dimensions, then follow the print-ready PDF checklist to inspect the rest of the file.
Technical references
Check your print provider’s requirements for the job; these references explain the underlying file and print settings.
Question or correction? Contact Ezra, Endorr Co-founder and Head of Digital Commerce, at ezra@endorr.com.
Read how we source, review and correct these guides.